There are quite a few guides on the net, how to replace an existing rechargable battery with a coin battery. Targeted mostly for big box Amiga’s and accelerators, but this can also be used for other similar replacements.
You all know it’s neccessary to change the rechargable battery. If you don’t I’ll tell you why: the battery contains what is commonly mentioned as battery acid, though for these batteries it’s base. Regardless it corrodes the electronics so the battery needs to be removed and the affected area needs to be neutralized. The battery can be removed by using cutters (be careful not to damage the PCB) or just desoldering it. A wash with either lemon juice or vinegar can be neccessary if the battery has leaked. Just drop some lemon juice/vingar and scrub with i.e. a toothbrush. Remove the liquid and wash with either water or isopropyl alcohol.
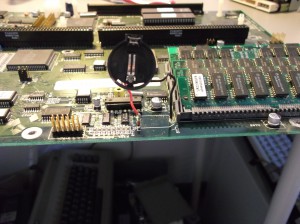
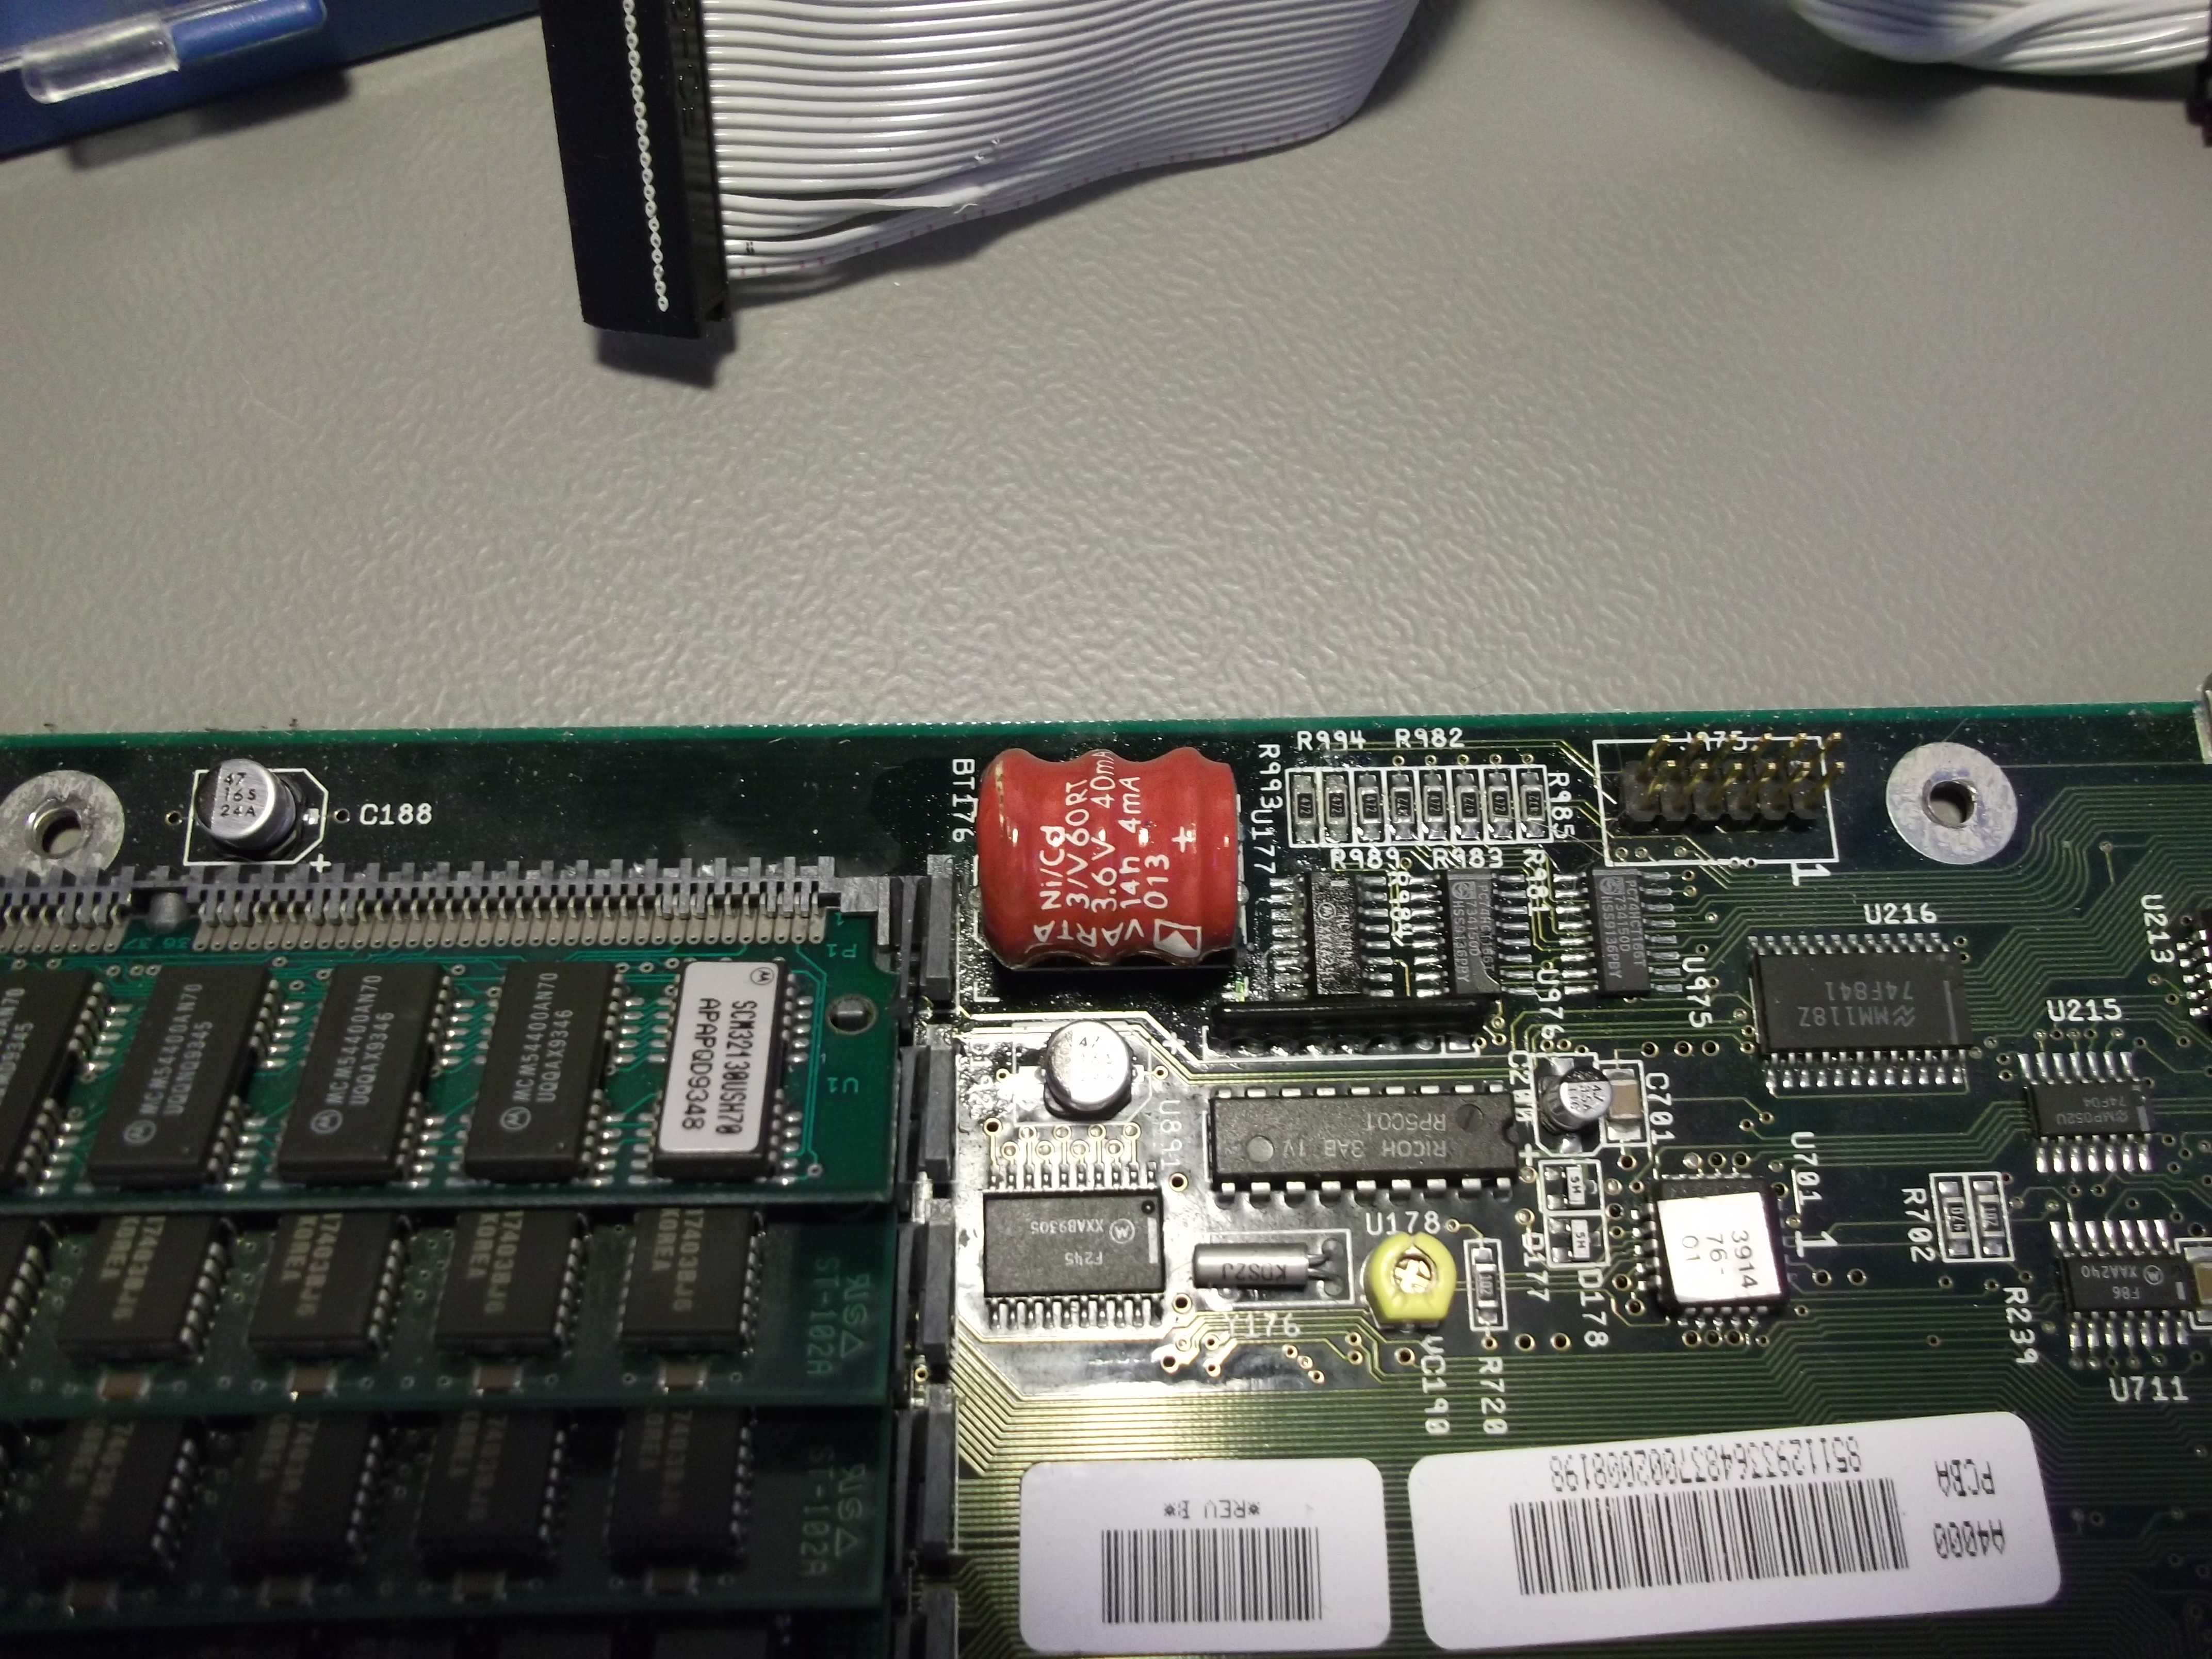 Before removal.
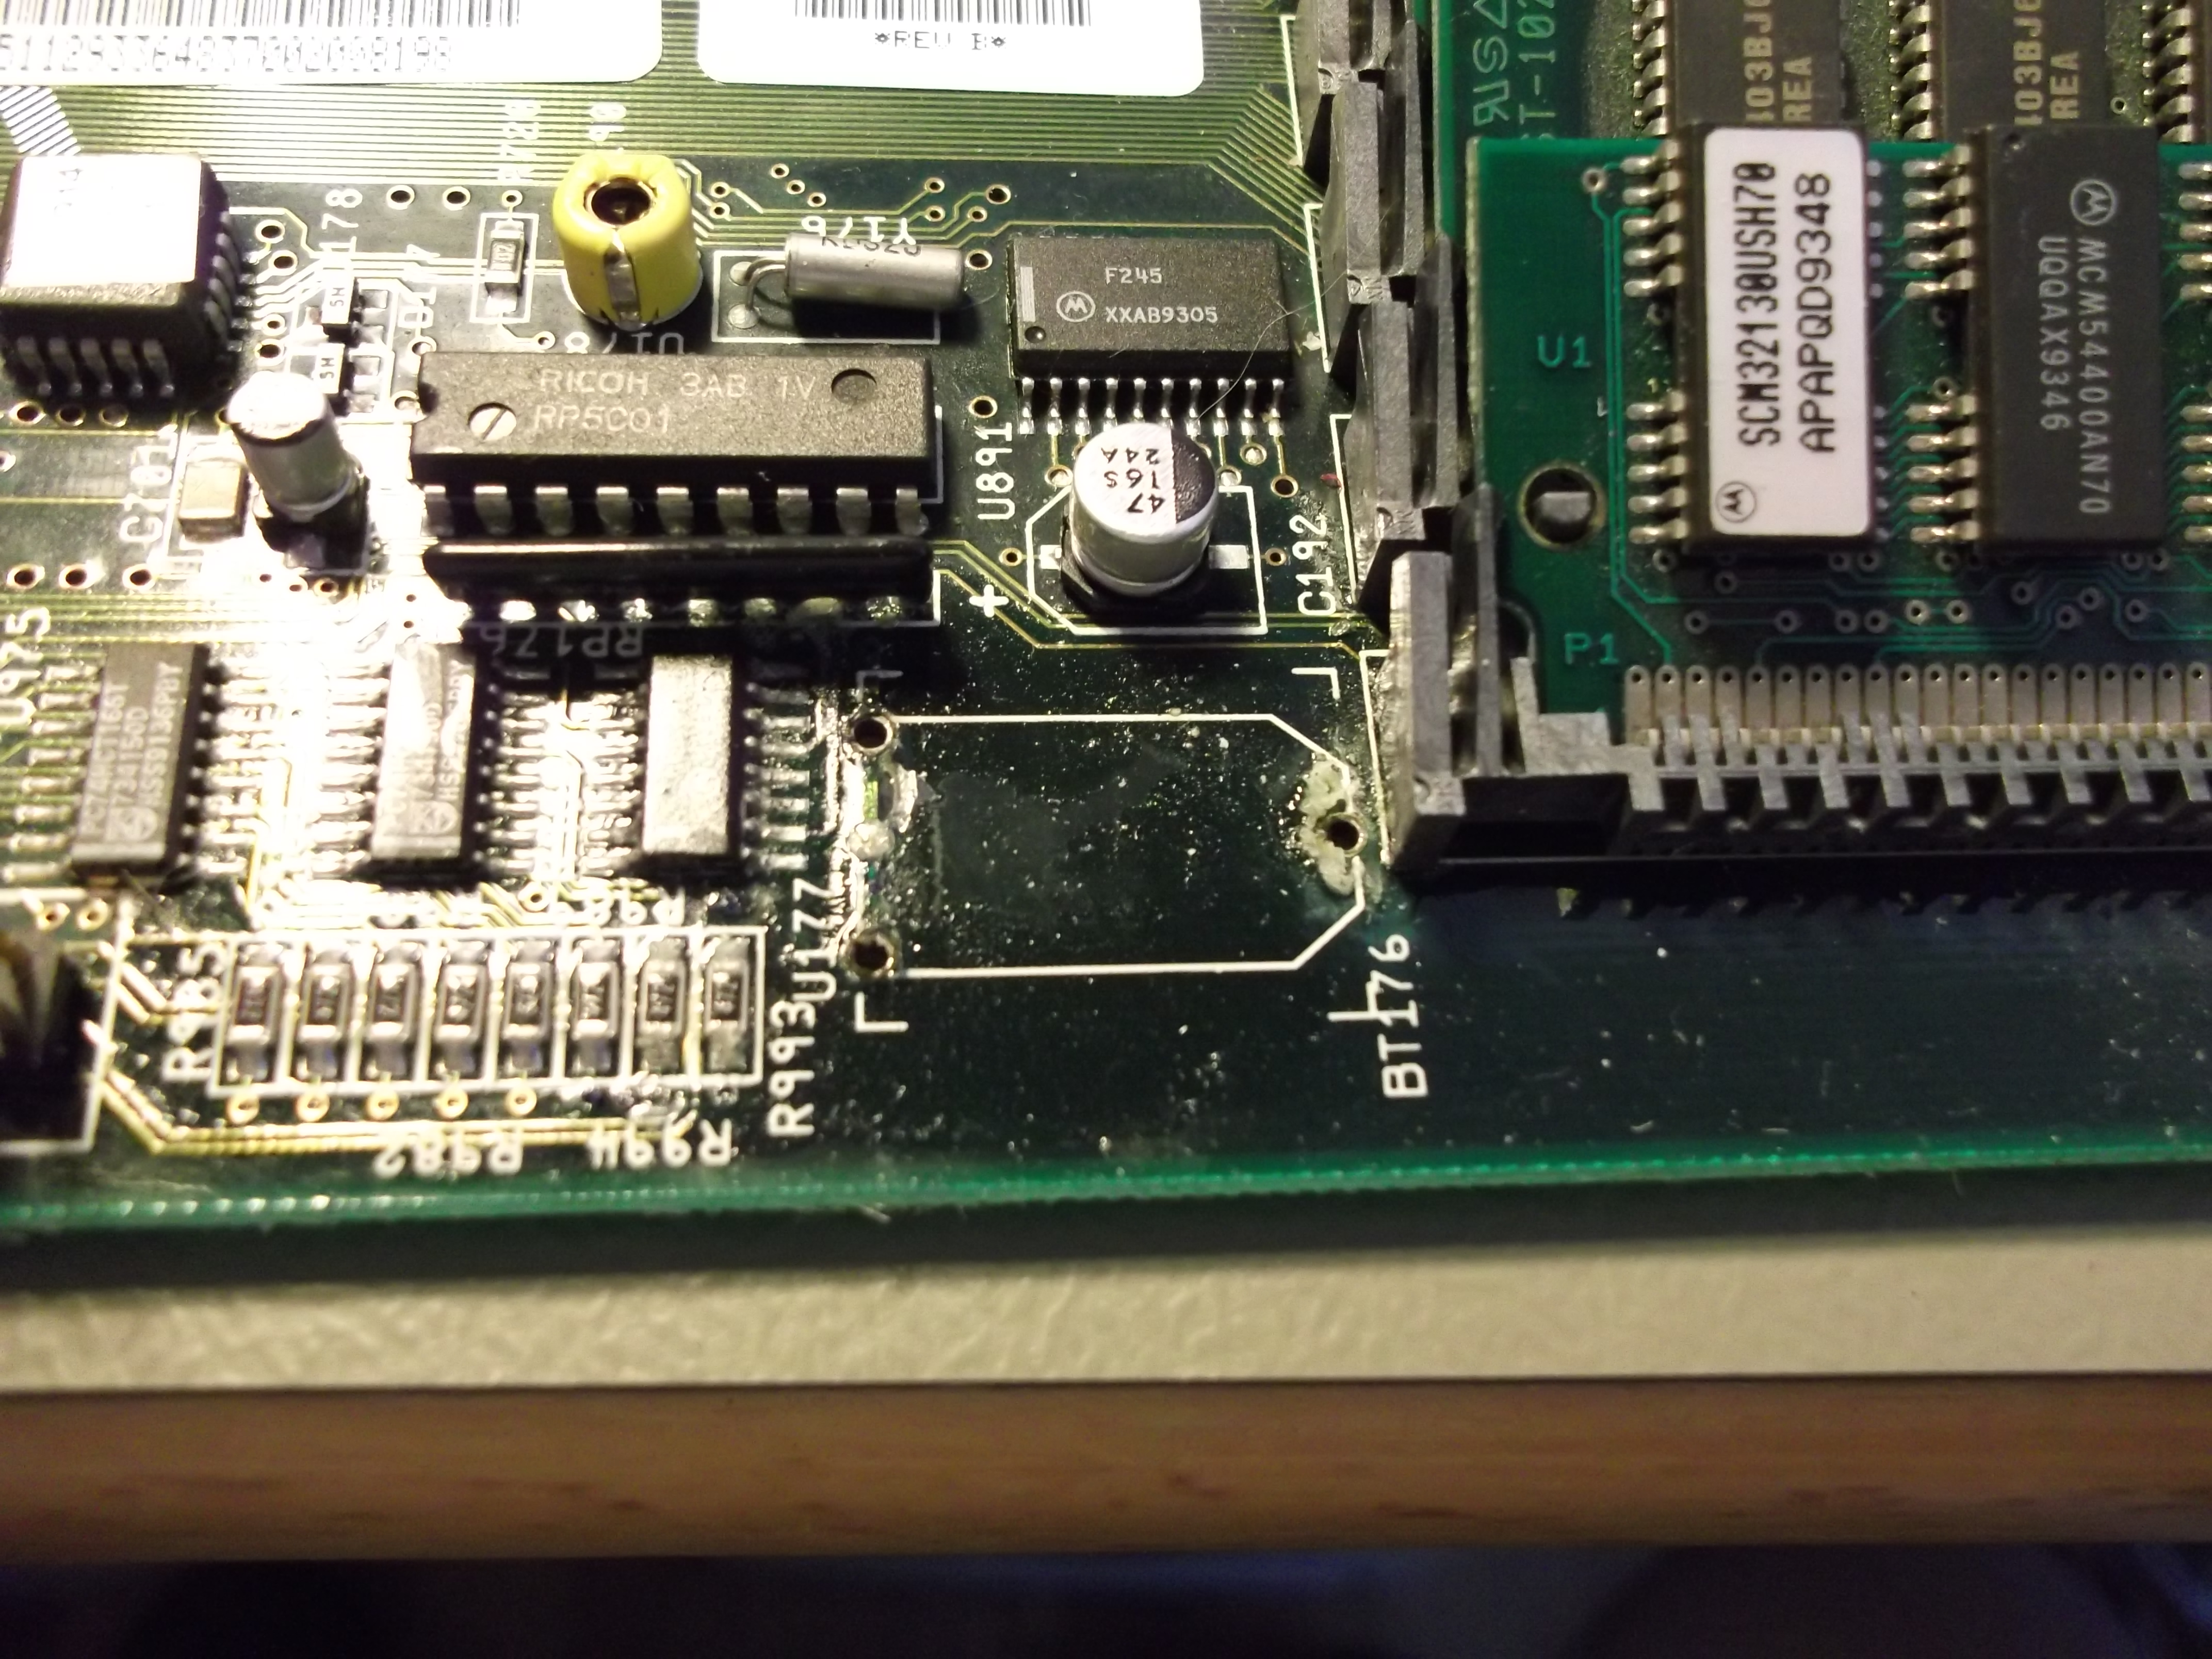 After removal, some area has been damaged, but luckily not much.
If you’re going to replace with a coin battery like the CR2032, which are quite common these days, you’ll need to add a diode to prevent recharging of the battery with 5v.
The drawing below should explain it all.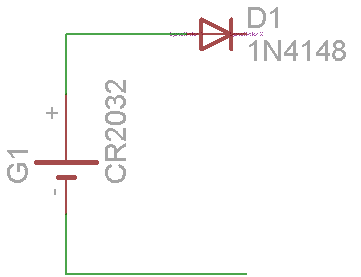 The schematic on the new battery.
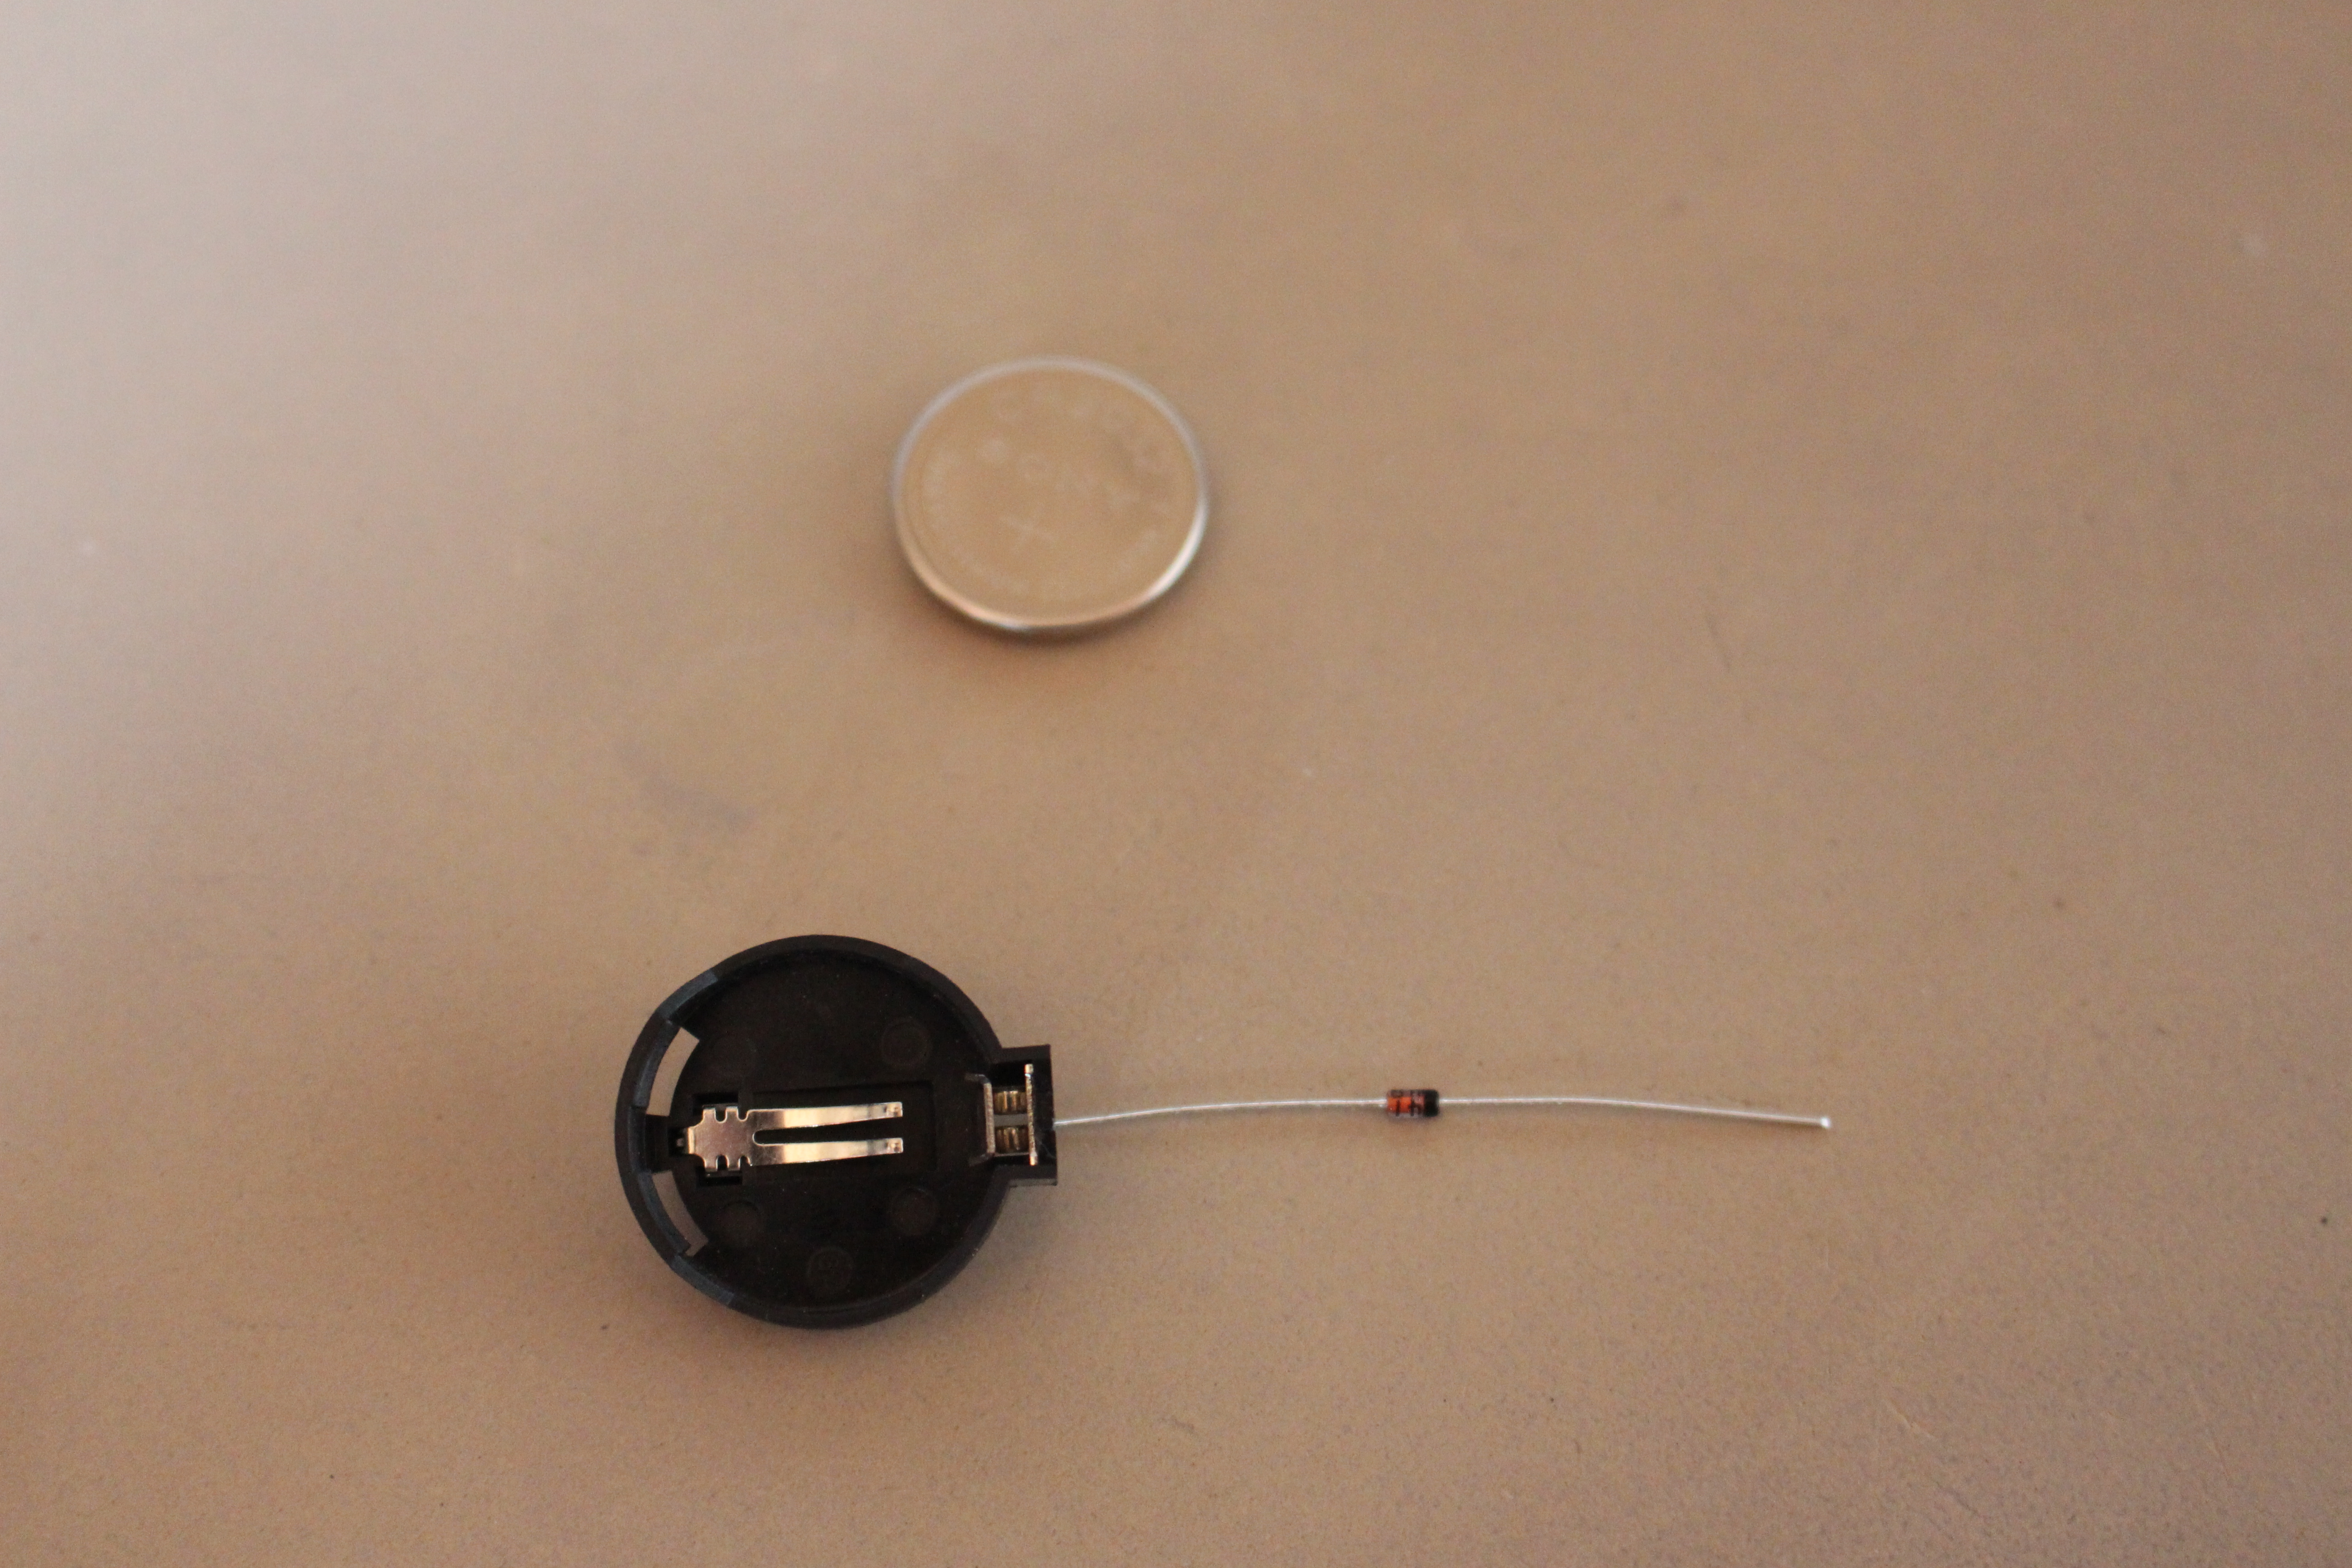 How it needs to be soldered, plus is to the right and minus is to the left.
Some diode theory 101:
Notice the black ring on the diode, this should be to the farthest side away from the coin battery. Notice the same “ring” on the schematic, that lone vertical dash, thats how you identify which is which. The left side here on the drawing is called anode, and the right side is called cathode. If you turn the symbol 90 degrees CCW, the symbol almost looks like an A, and from the other side it looks like a vertically-mirrored K (just pronaunce the cathode as kathode).
The cathode blocks all the voltage (to a certain degree) that lies on the kathode, whereas the voltage that lies on the anode passes on to the cathode, though loosing around 0.6-0.7 volts.
This way we prevent 5v that’s used to charge the old battery to also charge the non-rechargeable CR2032 battery.
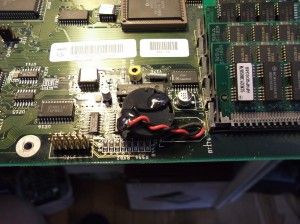
It’s hard to see on this pic, but the black wire extended from the red is a diode all wrapped in a shrink tube. The solder pads here have been dripped with hotglue to prevent shorts.
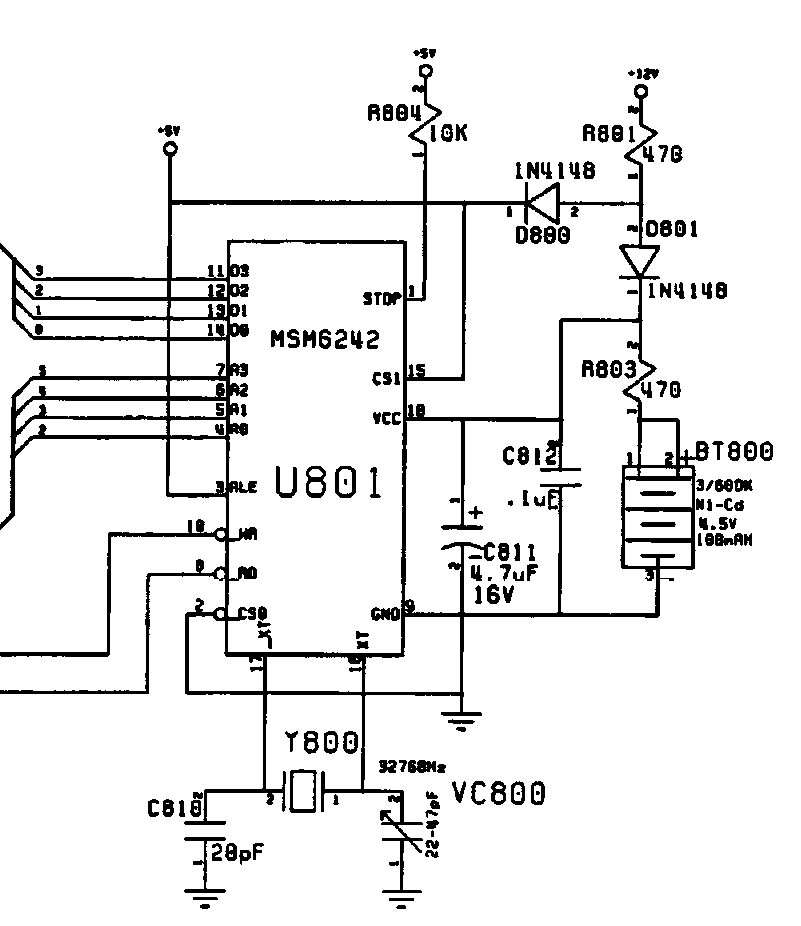 On this schematic taken from the Amiga 2000 schematics, the battery we’re replacing is in the lowest, rightmost corner (BT800). Looking up the Datasheet of the MSM6242 real time clock, the lowest voltage for battery backup is 2v. So with the CR2032’s 3.3v minus the 0.7v (= 2.6v) the battery supply is still enough to sustain the real time clock.
Components used: CR2032 socket, 1n4148 diode.
You can use most regular diodes like the 1n4141.
Update: 2019-04-02
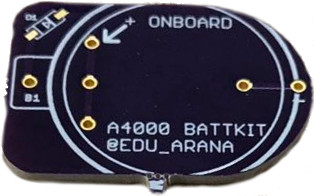
Araranet has created a small pcb which works as a drop in replacement for the old barrel batteries, The A4000battkit, ready for sending to pcb companies like jlcpcb.com.
I have a ton of old motherboards with coin cell holders on them, and tons of boards with various diodes in them. I was hoping I could just desolder a holder, and some random diode, and install it on my Amiga boards.
thank you for providing part numbers for the diodes, but would you have a way to tell from existing diodes available in my boards, which ones I can use?
I’ve read about Schottky diodes, and their lower voltage drop, and I think that might be a diode to look for, but I certainly do not understand the differences of diodes.
Does it really pay to scrape old boards? you can get the socket holders for almost no money with free shipping on ebay, the same goes with diodes. Using a Schottky is also an option as the margin is low, when using a regular diode. In general any diode that can block 7v (using stats just on the edge is not recommended, so here it’s alittle higher) and up can be used, of course you’ll have to read some datasheets.
Since I wrote the article, someone has created and open sourced pcb, so it’ll go to the article in a few.
https://github.com/arananet/a4000battkit – you can order the pcb’s from i.e. jlcpcb.com which I use myself for $2 for 10 (+shipping).
this pcb is both with smd and throughole diodes.